Jobs That Require An Electrician
Electricians are essential to the operation of homes, businesses, and industrial facilities. This career combines technical expertise with physical work and meticulous attention to detail.
Rather than attending school to earn a degree, most electricians learn their trade through a four- or five-year apprenticeship program. This apprenticeship allows them to earn a living while they train. Contact Nash Electric LLC now!
The wiring in a house is the conduit that carries electricity from the power source to switches, outlets, and other appliances. In many older homes, the circuits are overburdened, straining to supply the many electricity-hungry gadgets in use. The wires themselves often need to be updated. An electrician can inspect the wiring and make upgrades as needed.
Wires and cables have markings stamped or printed on their insulation or outer sheathing that tell electricians important information. These include the wire size, material and number of wires inside a cable. The size tells electricians how much current the conductor can safely carry. The insulation also has an electrical resistance rating, which is how much heat the conductor will dissipate.
An electrician needs to understand how to read and interpret an electrical wiring diagram before beginning a project. This will help them plan for the right amount of wire and anticipate when they will need to add more. It will also help them avoid making mistakes that could result in a fire or other dangerous situation.
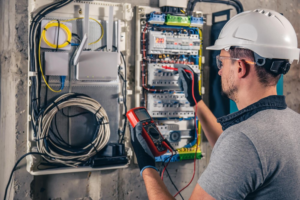
Every home has a service panel that distributes electricity to switches, outlets and other appliances. This panel is usually located in the basement or garage and is the place where you shut off power to a particular circuit before working on it.
All new installations of electrical wiring are required to be color coded. This is to prevent accidental contact between live and neutral wires, which can cause a fire. The colors used are determined by government regulations and may vary from country to country.
A professional electrician can install electrical wiring in a variety of ways, including running it through a receptacle box and then using it to connect to the switches and other devices. They can also install it in a wall or ceiling by using metal conduit. This is a more involved process that requires cutting and shaping the conduit, but it provides a more durable solution than simply running the wires through holes in a stud.
DIYers can save money by installing their own wiring, but they should have a thorough understanding of electrical wiring before starting a project. They should also make sure they are properly qualified to do the work or know someone who is. An injury caused by improper wiring can be very serious and even deadly.
Circuit Breaker Installation
Adding or replacing a circuit breaker is one of the most common jobs for an electrician. Homeowners may need to add a new circuit for an expansion of their electrical system, or replace a faulty breaker that is overheating or causing a fire hazard. There are many important safety precautions to be aware of before attempting this task. It is important to turn off the power supply to the breaker panel before working and to wear rubber-soled shoes, gloves, and insulated tools. It is also important to test the incoming wires with an electrical tester to ensure they are not live before working with them.
A breaker panel is a metal box that contains the breakers that control electrical current in your home. It is usually located in a utility room, basement, or garage and has a hinged door that covers the breaker terminals inside. A professional electrician will shut off the power supply to the breaker panel and disconnect the large black wires feeding into it before opening the cover and removing the breaker. The breaker panel should be clean and free of debris or dust.
If you are adding a new circuit, first choose the location in the breaker panel where you want to install it and note any unused spaces. Then locate the knockout tabs in the breaker panel cover that are pre-punched to accommodate electrical wiring. These holes are used to feed the wires through, and they can be opened with a screwdriver or hammer. Once you have a space to feed the new breaker wire through, loosen the screws holding the panel cover in place and set it aside.
Next, remove the breaker from its packaging and identify its voltage and amperage. It is important to use a breaker that matches the amperage and voltage of your electrical system to prevent overheating or fires. If you are installing a new circuit for a living area, it is required by code to use an arc-fault circuit interrupter (AFCI) instead of a standard breaker.
Once you have the correct breaker in place, reattach the panel cover and tighten the screw holding it in place. Then, reattach the wires to the appropriate terminals on the new breaker and connect them to their corresponding bus bars. Once you have everything connected and the breaker is in the on position, turn the power back on and test it for proper operation.
Troubleshooting Electrical Problems
When you’re experiencing electrical problems at home, it can be difficult to determine where the problem lies. Luckily, there are some straightforward techniques that you can try before calling in a professional.
1. If the Outlet or Switch Is Warm, Then You May Have a Problem
You can tell if an outlet or light switch is faulty by touching it. If it feels hot, that means that the current is flowing through it more than it should. If this happens frequently, then you should call an electrician to repair it.
Another way to test an outlet is by plugging something into it. If it doesn’t work, then the outlet likely has loose contacts that need to be tightened. If it still doesn’t work, then you should replace it with a new one.
- If the Circuit Breaker Keeps Tripping
It’s important to assess your electricity usage before determining what’s causing the breaker to trip. If it’s a regular event, then you might be overusing the power in that area of your house. This could mean that you’re running too many appliances at once, or that your household appliances are outdated and not up to New York state requirements.
Once you’ve determined what the cause of the tripping is, turn off all of the switches in the area that’s affected. Then, use an ohm meter to test the connections on each of the wires leading into that outlet. If a wire isn’t connected properly, or it’s frayed, it can draw too much current and create a fire risk.
- If the Electrical Power Is Constantly Flickering
A flickering light can be caused by a variety of issues, from a simple bulb replacement to an unstable electrical system. A qualified electrician should be able to inspect your wiring and fixtures to ensure that they’re up to code.
Power surges are also dangerous and can damage your electronics. They’re often caused by lightning strikes or electric company slip-ups. However, you can protect your appliances by using surge protectors. In extreme cases, you’ll want to hire an electrician to look for a serious issue like a short circuit that could be causing your devices to overheat and burn out.
Electrical Safety
Electricity is dangerous, even in low voltage forms. It requires the knowledge, skills and focus of a professional to work safely. Every year, 411 people die from electrocution on the job, and thousands more sustain serious injuries. That is why service professionals must always follow best practices when working on electrical systems – at home, in commercial sites and in industrial environments.
Electrical safety begins with ensuring that the circuit is not energized, and this can be done by using a multimeter to check for volts before touching wires or equipment with gloves. If there is any doubt that the circuit is energized, it must be locked and tagged out according to the company’s Lockout/Tagout procedures before any electrical work can take place. This can be achieved by shutting all panel doors and making sure that all exposed electrical contacts are capped.
Other safety precautions include observing any signs of electrical hazards and having them corrected immediately. Damaged insulation, for example, can increase the risk of shock and fire. Keeping electrical cords away from water sources, installing ground fault circuit interrupters (GFCIs) in wet areas and ensuring that any confined spaces have adequate ventilation all reduce the risks of fire, shock, and tripping.
Having the proper personal protective equipment is also vital, including wearing the right PPE such as safety glasses, hard hat and insulated gloves. Cluttered workspaces also raise the dangers of accidents, so good housekeeping and a well-planned layout of electrical cords are important.
Finally, it is crucial to have regular electrical inspections performed. These can identify potential problems like overheated circuits and devices, and help prevent equipment failure, electrical burns or other hazards.
Working with electricity demands the highest level of technical understanding, which is why only trained professionals should perform these tasks. This could be through a combination of licensing, completion of an apprenticeship or formal education and training, or on the job experience. However, no matter the qualification, one thing is essential: a good understanding of the principles and hazards of electricity, both high and low voltage.
The Difference Between Plumbing and Piping
Plumbing is a complex system that brings freshwater in and carries away waste water. It uses the laws of gravity, pressure and water seeking its own level to work.

Plumbers must complete a training program, usually lasting four to five years, to gain skills and earn certification. They can also choose to enter an apprenticeship, which offers on-the-job experience and paid wages.
In a home or building, the plumbing system includes pipes that supply water and remove wastewater. These pipes are connected to various fixtures, such as sinks, toilets, faucets, showers, and water heaters. Plumbers are responsible for the maintenance and repair of this critical system. They follow strict building codes and regulations to ensure safe and efficient operation. While most people are familiar with the concept of a pipe, few know that there is a difference between piping and plumbing.
A piping system includes tubing, pressure hoses, valves, separators, traps, flanges, and fittings. Its purpose is to move, mix, separate, stop, distribute, or control the flow of fluids. This type of system is found in many industries, such as semiconductor, paper processing, petroleum refinery, and textile. It is usually made of stainless steel, aluminum, copper, plastic, or concrete.
The basic components of a piping system include the pipes themselves, which come in a variety of shapes and sizes. They can be made of metal, fiberglass, or concrete. They are joined together using various fittings and then sealed with flanges or other devices. These fittings allow for a variety of connections, including elbows, reducers, and couplings. They also can include a variety of valves, which are used to control the flow of liquids or gases.
Piping systems often contain a number of other devices, such as meters and instruments. They may also include insulation, which preserves the temperature of the conveyed material. They must also be designed to withstand the stresses of operation and environmental factors. For example, buried pipes need to be designed to resist soil conditions and other factors that can cause damage or rupture.
The design of a piping system is an extremely complicated task. It must meet numerous criteria, including sizing, bending radius requirements, and corrosion resistance. In addition, the piping must be able to withstand backpressure hazards and siphonage. It must also be able to transport chemicals with minimal risk of contamination. All of these factors must be balanced against the cost and convenience of the piping system. This requires careful analysis and a detailed understanding of the process.
Force Mains
A sewer force main is a pressurized pipeline that transports wastewater uphill when gravity cannot take it. These pipes are usually made of iron or a combination of copper, steel and other materials. They are designed to handle both the normal operating pressures and large surge pressures generated by frequent pump starts and stops. This requires the use of pressure-resistance-type joints and pipe materials that can withstand hydrogen sulfide and other chemical attacks.
These pipes typically discharge from a sewage pump station to another pump station or to a wastewater treatment plant. Depending on the topography of the area, the waste may continue on its journey in a gravity sewer or it may be released into a different gravity sewer system that is further downhill.
Compared to the rest of a sewer system, a force main is full of sewage at high internal pressures, so it must be able to hold up to this corrosive environment. Traditionally, these pipes have been constructed from cast and ductile iron. Today, however, thermoplastics such as acrylonitrile-butadiene-styrene (ABS), polyvinyl chloride (PVC) and high-density polyethylene (HDPE) are more commonly used to meet the demands of this type of plumbing infrastructure.
The main advantage of a plastic pipe over an iron pipe is that it resists corrosion. This is particularly important in areas where the water table frequently rises and falls and exposes the pipe to oxygen, which promotes oxidation. Regardless of the material selected, these pipes must be properly installed and maintained to ensure longevity and performance.
A force main’s condition can be difficult to assess because of its location underground. The effluent is opaque to CCTV cameras and grease and sludge buildup can obscure evidence of problems. Additionally, a force main is typically not part of a redundant system, so it can’t easily be taken out of service for inspection.
Because of these difficulties, a comprehensive maintenance and inspection program is essential for maintaining a reliable sewer force main. It should include televising and cleaning of the pipeline, as well as regular testing and pigging to check for any blockages in the system.
Inverted Siphons
Inverted siphons are a hydraulic engineering solution to overcome topographical barriers that would otherwise inhibit fluid flow in a water or sewer system. The primary benefit of an inverted siphon is its pump-free operation, which can contribute to lower operational costs and a reduced environmental footprint compared to conventional pumps.
An inverted siphon uses a combination of air pressure, gravity and the difference in density between liquids and mercury to transport water or other fluids across valleys or depressions that would normally block the passage of conventional open channels or pipelines. This type of structure may also be referred to as an inverted syphon, inverted aqueduct or sewer air jumper.
While a simple siphon cannot output liquid at a level higher than its source reservoir, a more complex device combining an airtight metering chamber at the crest of the inverted syphon can do just that. It requires a large amount of falling liquid to generate sufficient energy, but can dispense small volumes of water above the reservoir on an ongoing basis without additional pumping power.
The inverted syphon design is also constructed to maintain a specific hydraulic gradient, which helps to keep the fluid flowing even as the highest point rises and falls along its length. Engineers typically aim for a Mannings n value of about 10 m (33 feet) for water and 0.76 m (0.62 ft) for mercury at a given temperature, which ensures adequate pressure to resist any elevation changes in the system.
Inverted syphons are also designed with access points or manholes at regular intervals to allow for periodic maintenance and inspection. Regular inspections can help to identify any blockages, structural problems or other issues that might hinder flow through the inverted siphon, preventing water from reaching its destination.
In addition, long-term monitoring of an inverted syphon can provide valuable data to support ongoing system optimization and refinement. This can help to identify potential areas for improvement, such as reducing the inverted siphon’s energy usage or improving its durability and resistance to corrosion and other damage over time. As the need for rehabilitation or upgrading of an inverted syphon arises, pipe repair and other rehabilitative techniques can be used to address any concerns that might arise.
Drain Cleaning
Drains carry waste from the various fixtures within your home into the sewer system or septic tank. Regular drain cleaning helps prevent clogs and maintain proper function. It’s also an effective way to catch and address minor problems before they turn into larger ones.
For smaller issues like 2” and 34” drain lines, chemical cleaners are often enough to clear obstructions. For more serious blockages, mechanical processes are usually required. These may include drain snaking, where a flexible cable is pushed down a drain to break through and disintegrate a clog. These methods are often referred to as “pullers” or “augers.”
A popular drain cleaner, Bio-Clean, is an enzyme formula that dissolves hair, grease, soap scum and food waste in your pipes. It is safe for all pipes, including copper and PVC, and doesn’t produce any harsh fumes. While it isn’t as fast-acting as chemical cleaners, it still works well, and can be used regularly to keep your drains flowing smoothly.
Many chemical cleaners contain caustic elements that can damage your pipes and are not recommended for regular use. They can also cause burns if they come into contact with your skin or eyes. Some chemical cleaners can even react with water to create toxic gas, which can be dangerous or even fatal if inhaled. For these reasons, it is essential to always follow the instructions on the product you choose and never mix drain cleaners with other household cleaning products.
If you need to clean a stubborn drain or line, consider hiring a plumber. They have the experience, tools and training to get the job done right. This includes thoroughly inspecting the drain line after cleaning to ensure that all obstructions have been removed and determine what caused the clog in the first place.
Some clogs, such as those caused by tree roots invading your sewer line, are more severe and require professional assistance. A service technician may be able to use a snake or drain auger to mechanically remove the obstruction and can perform a video inspection to identify the problem. They can then recommend the most appropriate solution, such as a root destroyer that can be applied at the clog’s location to gradually clear sewer lines.
How Sealcoating Can Enhance the Curb Appeal of Your Driveway Or Parking Lot
Sealcoating is a cost-effective way to maintain your asphalt pavement. It protects the paved surface from damaging substances such as oil, fuel and chemical spills.

It also prevents the asphalt binder from degrading. This degrading is caused by U.V. rays, chemicals and rain. Visit https://www.rochesternysealcoating.com/ to learn more.
Asphalt that is sealed will last longer and save you money on various repairs and maintenance techniques.
Sealcoating is an essential part of asphalt maintenance. It protects the pavement from deterioration caused by the weather, sun exposure, automobile fluids, and other chemicals. It also helps prevent the formation of cracks and potholes. Regular application of seal coat can extend the lifespan of your driveway or parking lot and reduces your maintenance costs.
Before a sealcoat can be applied, it is important to prepare the pavement. The surface needs to be free of debris, and weeds should be pulled up. If you have a sprinkler system, it should be turned off for a day or more prior to the sealcoating process, and it must remain turned off until after the sealcoat has been fully set. In addition, all vehicles should be removed from the area to be worked on and the area must be blocked off with signs or cones so that people and cars don’t get into the area during the process.
During the preparation process, professional pavement contractors will use brooms and air blowers to remove dirt and dust from the pavement. This will ensure that the new seal coat has a solid base to adhere to. They will also clean out any oil or gasoline spills that may have accumulated on the pavement. These petroleum-based fluids degrade the asphalt surface and weaken the bond between the pavement and the new sealcoat. Finally, any linear cracks that are present in the asphalt will be filled with hot rubberized crack filler and sealed.
The next step in the process is to emulsify the material that will become your sealcoat. This involves mixing water with a chemical called refined coal tar. The mixture is then sprayed onto the surface of the asphalt pavement.
Once the sealcoat has been applied, it must sit for 24 hours to completely dry. This is an essential step because the materials that comprise a sealcoat are carcinogenic and can cause health problems in those who come into contact with them.
Application
Seal coating is the application of coal-tar or asphalt emulsions to a parking lot, road, driveway, sidewalk, patio, or any other paved surface. It helps prolong the life of your pavement while making it look like new, which can enhance the curb appeal of your property or business. It is a cost-effective way to repair minor cracks, protect the asphalt from harsh weather conditions, and keep the environment healthy.
Before any work begins on a sealcoat project, the area to be treated should be blocked off with cones and barricades to prevent pedestrian or vehicular traffic from entering the site during the process. The sprinkler system should be turned off to ensure the grass in the area does not get wet during the application. The sealcoat should be allowed to dry for a full 24-hour period before vehicles can be driven on it again.
The first step in the process is to remove any existing paint, markings or stenciling on the asphalt surface. Sweeping and blowing equipment should be used to clean the entire surface, as dirt and debris left on the surface can cause poor adhesion when the sealcoat is applied.
Once the surface is clean, workers will spray the sealcoat on the surface using pressurized equipment or self-propelled squeegee machines. They will spread the material across the entire surface, paying special attention to the edges where the sealcoat is likely to wear away more quickly. They will then hand squeegee the coat to provide extra thickness and to ensure there are no bumps in the finished product.
When the coating has dried, a walk-through should be done to make sure it meets the company’s quality standards. Any areas that aren’t meeting expectations will be touched up, and any cracks or chips in the surface will be filled in with new material.
Pavement that isn’t sealcoated is prone to rapid deterioration, which can be costly to repair. A proper sealcoating job can extend the life of your pavement for decades, saving you money in repairs and replacement costs. It also provides a smooth, safe, and attractive parking lot for your customers and visitors.
Maintenance
A parking lot is the first impression visitors have of your business, so a well-maintained, smooth asphalt surface will make a good impression. Asphalt sealcoating is a cost-effective way to keep your property looking like new and to slow down the deterioration of your pavement. It also helps protect the pavement from oil and fuel spills, chemicals that degrade asphalt, and heavy traffic abrasion.
Before a sealcoat can be applied, the pavement needs to be clean and free of debris. This is done by blowing or sweeping the area. If there are any weeds or vegetation, they need to be pulled and washed away. This will help ensure that the seal coat bonds with the asphalt and lasts longer.
Once the cleaning is complete, the asphalt will be inspected for any cracks, potholes or other damage. Any areas that need repair need to be filled in or patched before the sealcoat is applied. If the area is severely damaged, the asphalt will need to be replaced.
When the surface is in good condition, the sealcoat will be applied to the pavement using a professional asphalt paving contractor. The process will involve blocking off the area and directing pedestrians to other areas of the property. A professional will be able to spot smaller trouble spots and address them before they grow into bigger problems, saving you money in the long run.
A sealcoat is made up of tiny bits of asphalt, sand and mineral particles that fill in the small cracks and holes in the pavement surface. Once it is applied, it looks almost like new pavement and provides a barrier against water, sunlight, oils and chemicals that degrade asphalt. A good quality sealcoat will last from 2 to 5 years, but it should be reapplied regularly.
The best way to maintain your sealcoat is to create a maintenance schedule and stick to it. A professional asphalt paving company can help you determine how often the sealcoat will need to be reapplied based on climate and other factors. They can also recommend the type of sealcoat to use. Coal tar is a common choice, but recent studies suggest that it may contribute to increased polycyclic aromatic hydrocarbon levels in streams and creek beds. Because of this, more and more municipalities are avoiding the use of coal tar sealants in their parks.
Safety
Sealcoating can improve the lifespan of your driveway or parking lot, but only if it’s done correctly. Incorrect application can cause premature deterioration and damage the pavement underneath. That’s why it’s important to hire a professional contractor that follows strict safety procedures and provides proper training for their crew.
Workers should wear protective clothing, gloves, and face masks when working with chemicals. Some seal coating materials contain carcinogenic chemicals that are dangerous to inhale or come into contact with skin. One instance probably won’t do much harm, but repeated contact could lead to cancer or other serious illnesses.
Worker safety is also a concern when applying and repairing asphalt. If a worker gets too close to a crack, they could be hit with flying particles from the hot sealcoat. This can lead to painful injuries, especially for workers who have to stand for long periods of time. That’s why it’s important for workers to follow strict safety protocols when sealing and repairing asphalt surfaces.
A Professional Contractor Has the Right Equipment
Professionals use specialized cleaning and application equipment that makes for a high-quality job. They’ll have blowers that can blow debris and dirt away, rotary brooms that scrub and brush the surface, and sweepers to remove large amounts of mud or dust. They’ll be able to identify and address any linear cracks that may need special attention. In addition, they’ll have a variety of spray equipment that allows for a smooth, even application and minimizes the risk of missed spots or excessive pooling. They’ll also use hand squeegees to get into tight spaces and create clean edges, giving the pavement a polished look.
Weather Matters
It’s important to apply seal coat only on a day with clear skies and moderate temperatures. Rain can affect the quality of the application and delay the curing process. Workers will check the forecast before applying sealcoat and will postpone the application if there’s a chance of rain in the near future.
Once the sealcoat has been applied, workers must let it dry for a few hours before using the driveway or parking lot. It can take up to three days for the asphalt to fully cure. During this period, you’ll want to avoid driving on the driveway or parking lot so that you don’t leave tire marks or scratch the new layer.